Imports
Use Imports to bring an existing customer list into Zellbox in one go. Supports CSV and Excel (.xlsx or .xls). Field mapping is interactive — the importer guesses, you confirm.
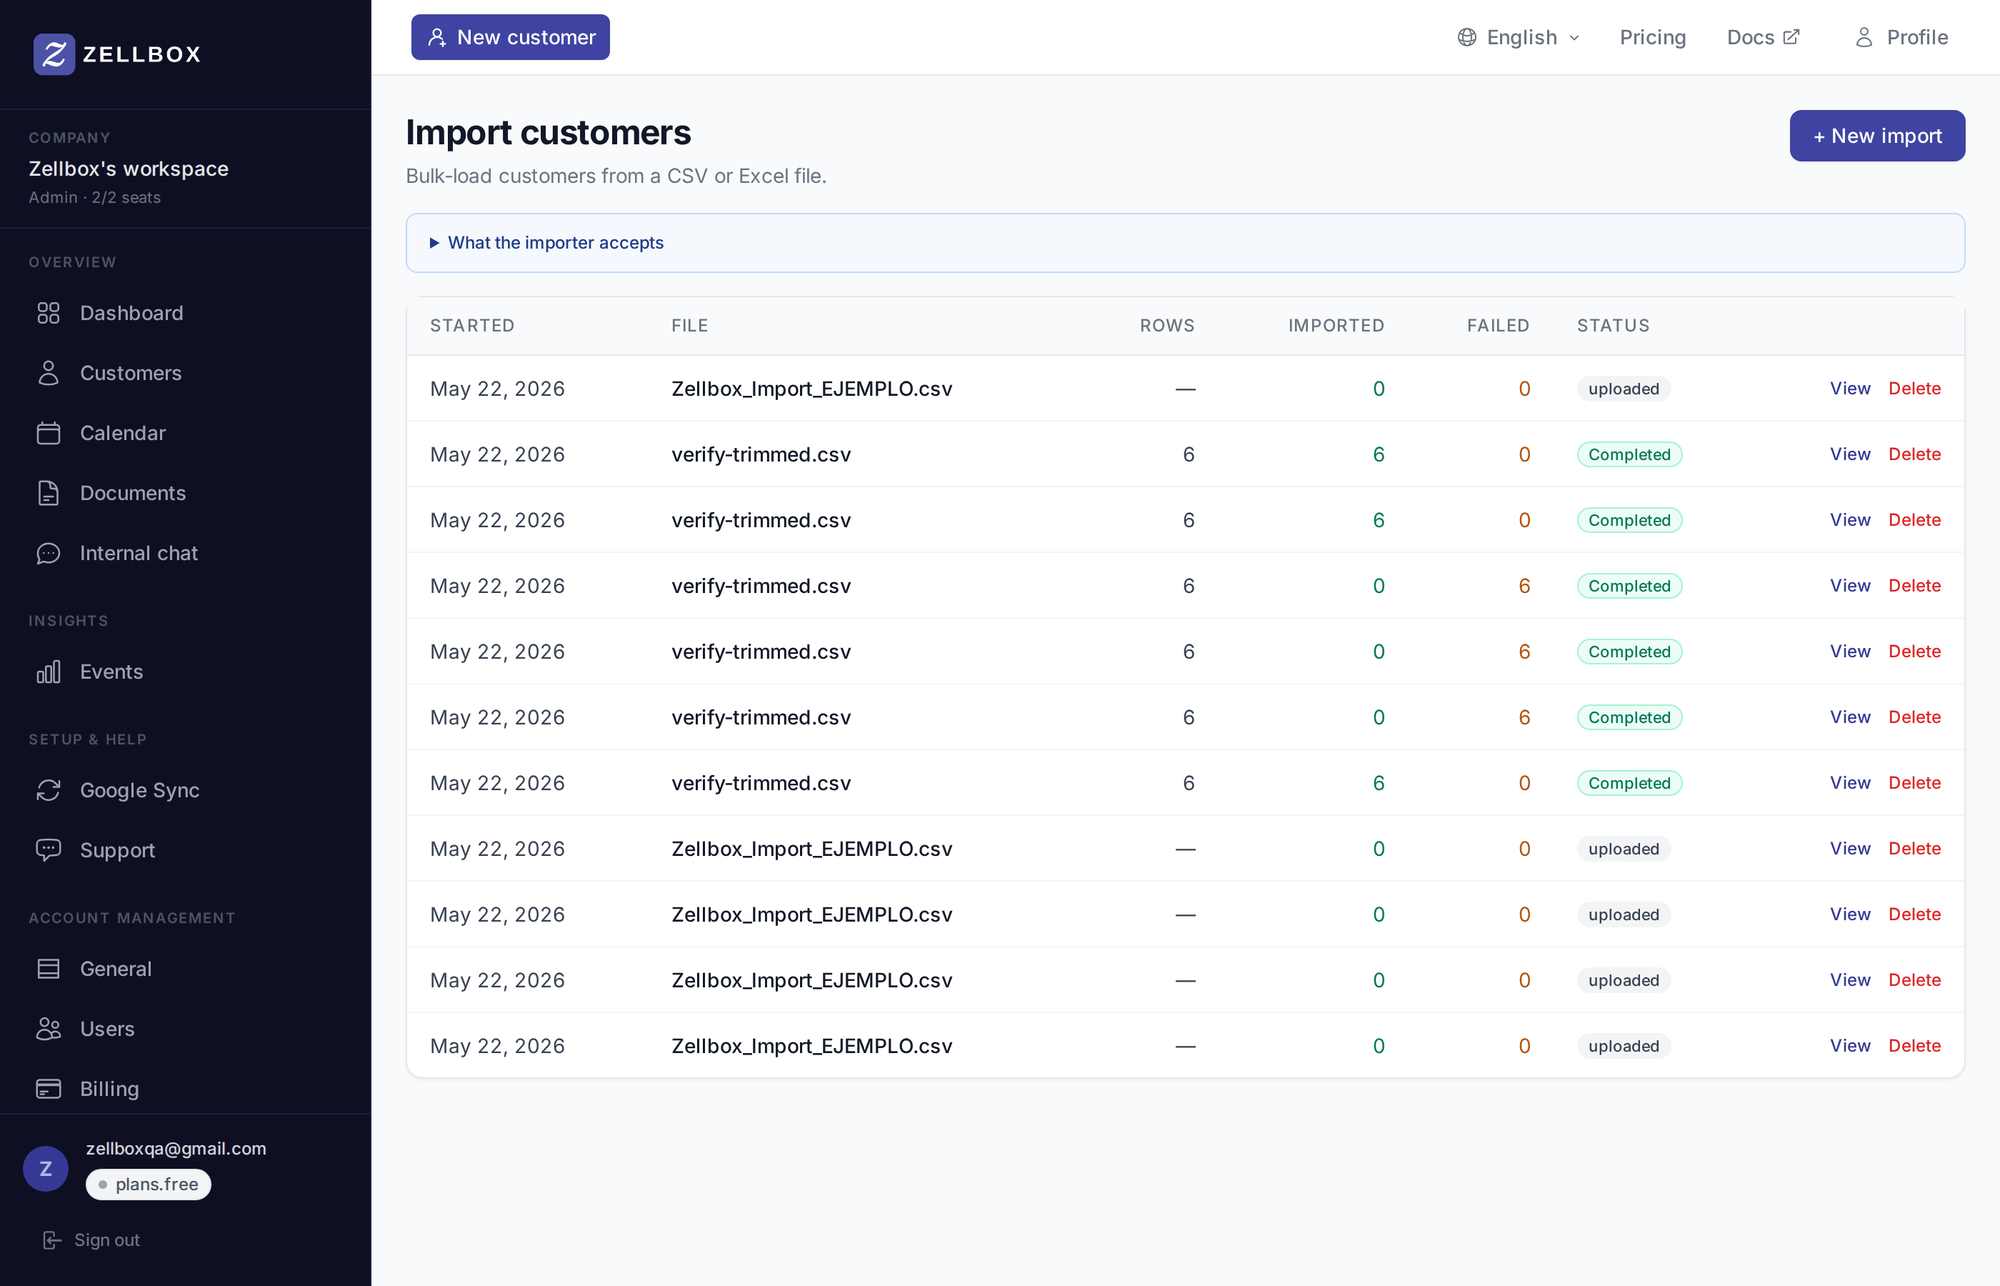
Importing a customer list
- Open Imports from the sidebar.
- Click + New import.
- Pick the file (CSV or Excel).
- The wizard walks four steps:
- Pick fields — the importer auto-maps your column headers to Zellbox's customer fields (built-in + custom). Confirm or pick another field for each column. Unmapped columns are ignored. Recognised columns: first/last/full name, email, phone, birth date, gender, language, tags, address (or its individual pieces), country, owner email (resolves to the assigned manager), and notes (becomes a customer note created right after the row). Every imported row is tagged with
SOURCE=importautomatically — no need for a "source" column in the file. - Format — date format (MDY / DMY / YMD / ISO) and number format (US / EU). Auto-detected from the data, change if the guess is wrong.
- Defaults — per-field tri-state controls (Skip / Fallback / Override) for the values to apply across all rows when a column is missing or empty. Three locale-relevant slots pre-hydrate from sensible sources so you usually don't touch them:
- Default language: starts from your last import (remembered in the browser) or, on a first import, from the workspace's default customer language. Backend safety net: even if you skip this step, the worker falls back to the workspace default per row so customers never land with an empty language field.
- Default country: remembered across imports.
- Name order (given-first / family-first): remembered across imports.
- Confirm — see plan-limit math, sample resolved rows, and a one-click Start. Starts the import in the background.
- Pick fields — the importer auto-maps your column headers to Zellbox's customer fields (built-in + custom). Confirm or pick another field for each column. Unmapped columns are ignored. Recognised columns: first/last/full name, email, phone, birth date, gender, language, tags, address (or its individual pieces), country, owner email (resolves to the assigned manager), and notes (becomes a customer note created right after the row). Every imported row is tagged with
- The importer processes rows in batches and reports progress live. You'll get a summary at the end: created / skipped / errored. Failed rows show inline with a per-row Retry action — fix the value in-place and re-submit.
For very large lists, split into multiple files — each import is one job.
How the language is resolved per row
Each row's customer.language is resolved through this cascade, in order:
- CSV cell — if the row has a "Language" column and it's not empty.
- Wizard fallback — the Default-language value from the Defaults step (when set to Fallback mode).
- Workspace default — the worker's last-resort net pulled from Account → General → Default customer language.
- Wizard override — when set to Override mode, this wins over everything above. Pick this when "every row in this file gets language = es" regardless of source data.
This is the same cascade the single-customer create form follows, so a row imported here ends up indistinguishable from one typed into the form by hand.
Errors
Common failure modes that error a single row (the rest of the import keeps going):
- Invalid email — the row is errored, not created.
- Date parse failure — the date doesn't match the Format-step pick. Either fix the input or change the format pick.
- Owner email doesn't match a workspace member — the row is errored. Invite the member first, then re-import the failing rows.
Errored rows stay listed on the import-run page with a per-row inline field editor and a Retry button — fix the value that tripped the row and re-submit without re-uploading the whole file.