Appearance
Calendar
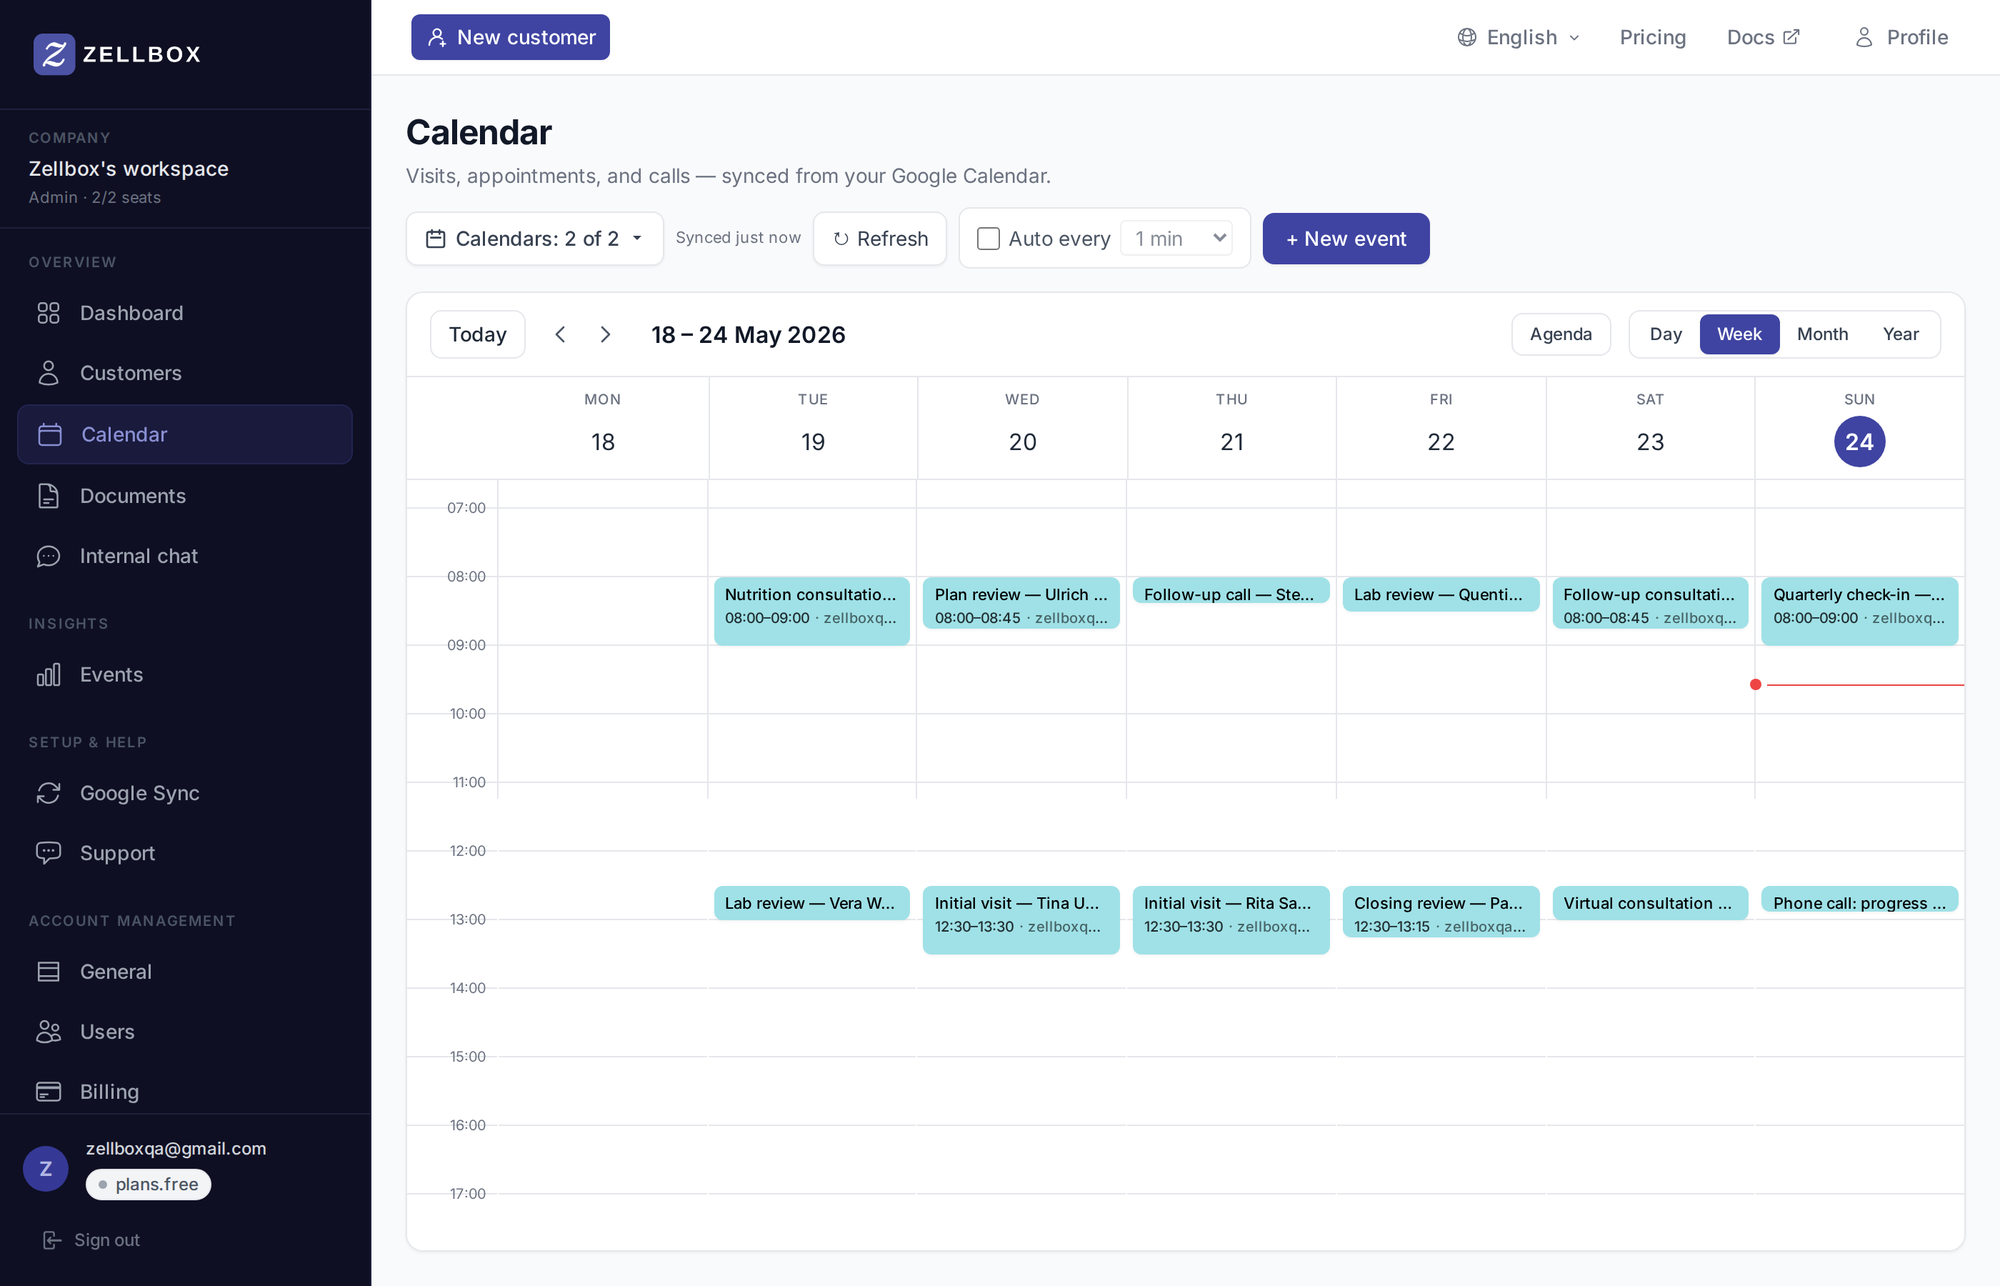
The calendar grid is where you see and schedule appointments. It's backed by two-way sync with Google Calendar — edits made on either side propagate to the other within seconds, or up to 5 minutes on the periodic tick if the live connection drops briefly. Available views: week (default), day, month, agenda, year. When more than one calendar is currently visible, the Day view automatically splits into one column per calendar — see Viewing multiple calendars side by side.
Connecting Google Calendar
- From any page in Zellbox where it's needed (Calendar, Dashboard, Account → Google sync), click Connect Google.
- You're sent to Google's consent screen. Approve the Calendar scope (and optionally Gmail — covered in Email).
- Zellbox redirects you back to the calendar. An initial sync job starts in the background; the dashboard shows live progress as each of your selected calendars finishes loading.
- Once the badge flips to Synced N ago, you're ready to go.
If you have many shared calendars (e.g. a receptionist driving 20 practitioners' calendars), the initial seed can take a few minutes. The Sync status page shows per-calendar progress.
Picking which calendars to sync
By default Zellbox syncs your primary Google Calendar. To add others (shared calendars from your team):
- Click the calendar-filter pill in the page header.
- Tick the calendars you want Zellbox to sync.
- Save. Zellbox does an immediate seed pull on each newly-selected calendar and starts including their events on the grid.
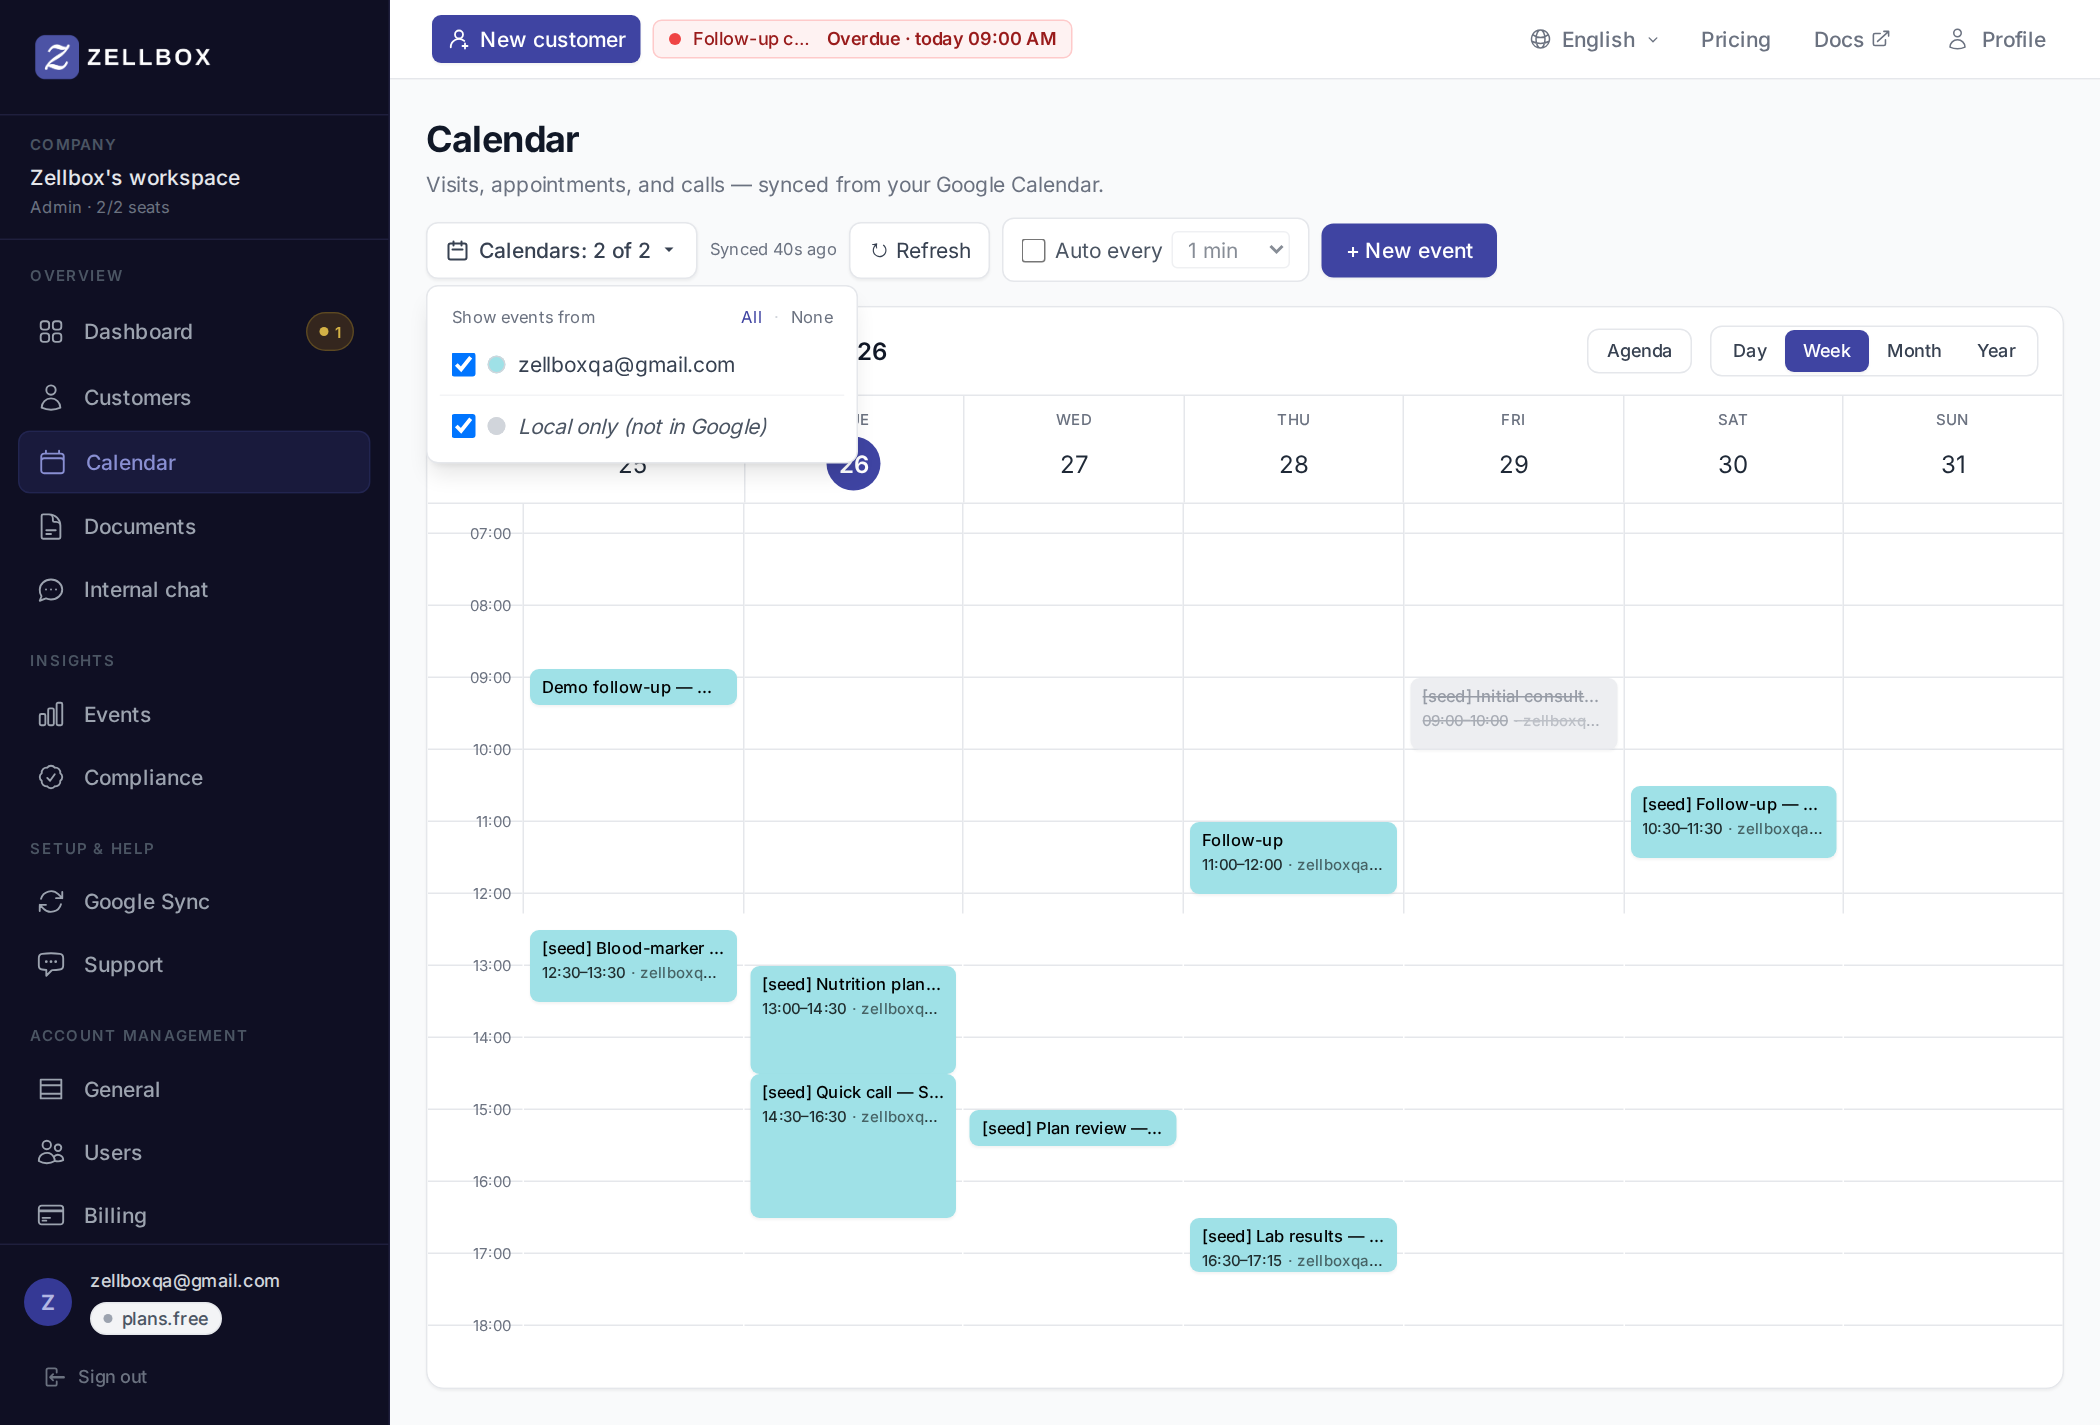
Deselecting a calendar stops syncing — the events Zellbox already mirrored stay on the grid (they're not deleted) until you either re-select or do a Reset.
Viewing multiple calendars side by side
When more than one calendar is currently visible (per the calendar-filter pill toggles), the Day view automatically switches to a per-calendar column layout — the same UX Google Calendar uses for its day view. The receptionist looking at "today, all four practitioners + the physio-room calendar" sees each calendar as its own column, instead of every event squashed into a single timeline.
The single-calendar Day variant still kicks in for solo operators or anyone who has only one calendar ticked — no layout churn.
Column header
Each column carries a small header pinned to the top of the scroll area:
- A coloured stripe in the calendar's Google colour for instant visual identification.
- A round avatar — the calendar owner's photo when we have it, initials tinted with the calendar colour otherwise. Real photos show up for:
- The operator's own primary calendar, sourced from the Google profile data captured when they connected Google to Zellbox.
- Workspace teammates whose Google account is also a member of the same workspace — Zellbox matches the calendar id (which is usually the owner's email) against the team-member list. The teammate's photo appears as soon as they've connected their own Google account to Zellbox at least once.
- The calendar's display name (the operator's nickname for the calendar wins; otherwise Google's summary; otherwise the teammate's profile name).
- A small Read-only label when the operator can't write to that calendar (no events.move, no slot-click create).
- A count chip showing how many non-cancelled events are on the column today.
Column order
- Your primary calendar is pinned leftmost so your own schedule is always at the same place.
- The remaining selected calendars follow in the order Google returned them.
- A Zellbox-only catch-all column appears on the far right only when at least one visible event hasn't been pushed to Google yet (rare — happens only when an event was created locally and the sync hasn't caught up).
Working in the multi-column view
Most of the same gestures from the standard Day view still apply, plus a few that only make sense with columns:
- Click an empty slot in a column — opens the create-event modal with that column's calendar pre-selected, instead of defaulting to your usual write calendar. The fastest way to book onto a specific practitioner.
- Click an empty slot in a Read-only column — does nothing. You can't create on a calendar you can't write to.
- Drag an event up or down — reschedules it (15-min snap), same as the standard Day variant.
- Drag an event across columns — moves the event onto the target column's calendar. Zellbox calls Google's
events.moveendpoint to relocate it cleanly; the event keeps its attendees, description, customer link, and reminders — only the source calendar changes. Drops onto a Read-only column or onto the Zellbox-only catch-all snap back; Zellbox refuses the move because there's no writable calendar to relocate the event to. - Drag the bottom edge of an event — resizes the duration in 15-min steps (same handle as the single-column Day view).
- Right-click an event — opens the action menu (Open customer, Duplicate, Share with…, Open in editor), same shape as the other views.
When viewport space gets tight
Columns flex to fill the available width but have a minimum so names and avatars stay readable. With many calendars selected on a narrow window, the column row scrolls horizontally inside the calendar area — the time gutter on the left and the column headers on the top stay glued in place while you scroll. If too many columns are blocking your work, untick a few in the calendar-filter pill to narrow the view.
Creating an event
Two paths:
From an empty slot
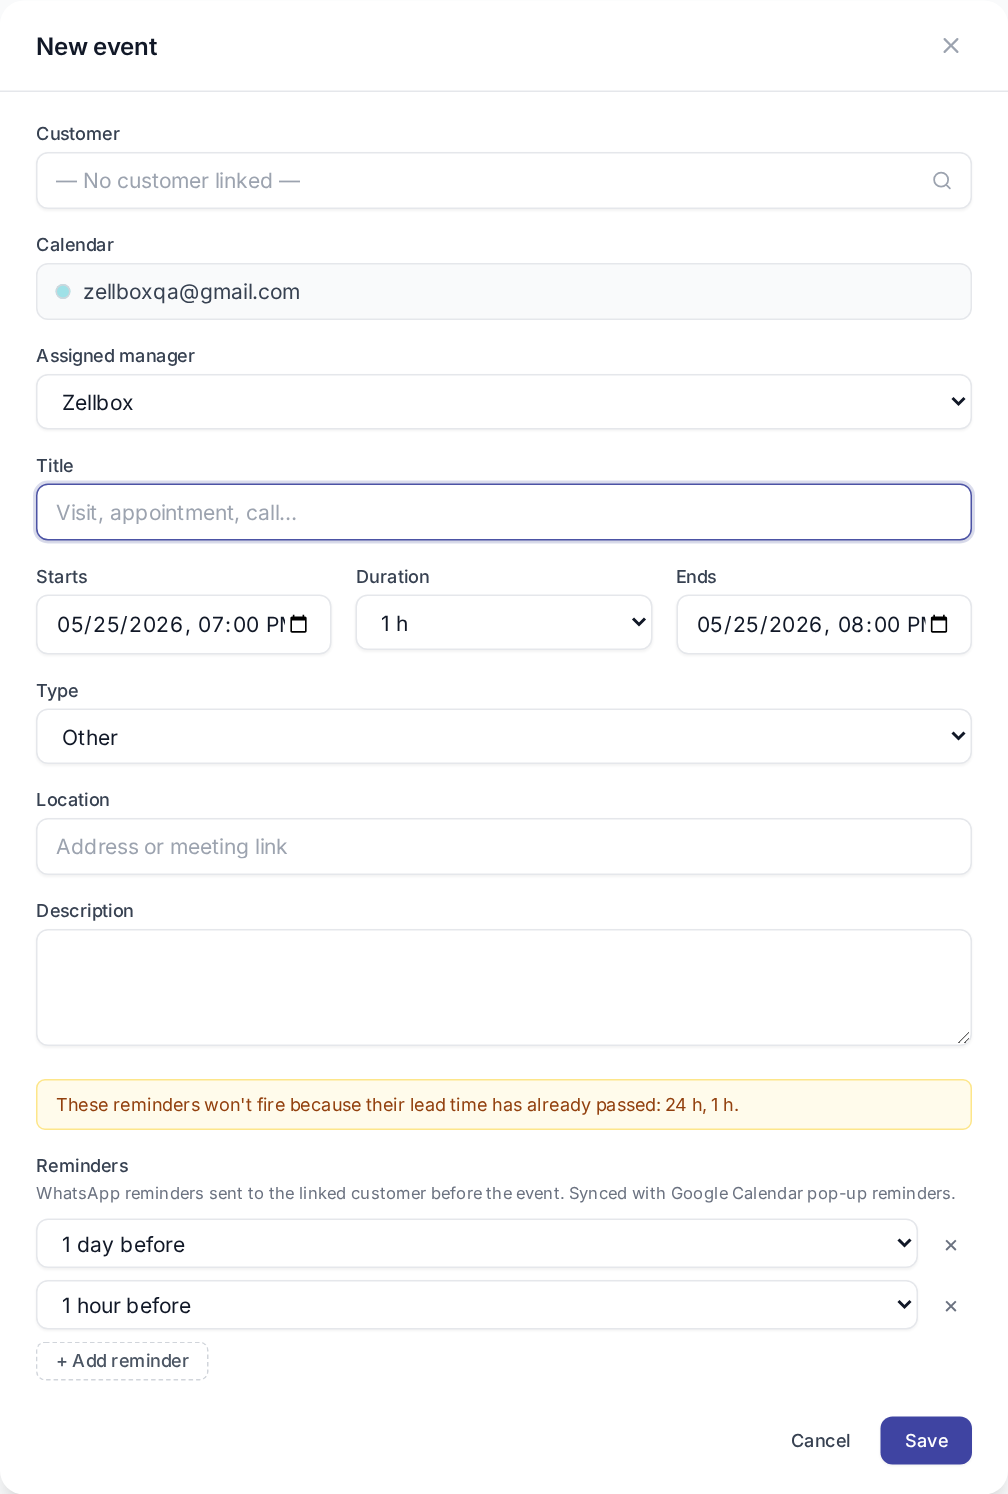
- Click any empty cell on the day/week grid.
- The event editor opens with the start time prefilled to that slot (default duration 60 min).
- Fill the title; optionally link a customer, pick an owner (defaults to you, falls back to the customer's primary manager when a customer is linked), set reminders, choose in-person / virtual / phone.
- Click Save.
From the customers list
- Find the customer in the Customers list.
- Click the Calendar action button on their row.
- A full event-form popup opens with the customer pre-linked, the customer's primary manager pre-picked as owner, and a live week-view alongside so you can see their availability while picking a slot.
In both cases the event syncs to your selected target Google calendar within a few seconds.
Moving or resizing an event
- Move: click-and-hold the event chip, drag to a new slot. Snap-to-15-minute increments. Release to commit.
- Resize: drag the bottom edge of an event chip to extend or shorten. Same snapping.
Both gestures push the update to Google. The grid previews the new position during the drag, then re-snaps to the final times once the change is confirmed.
In the multi-column Day view you can additionally drag an event sideways onto a different calendar's column to move it between calendars — see Working in the multi-column view.
Sharing an event in chat
- Right-click an event on the grid.
- Click Share with… in the context menu.
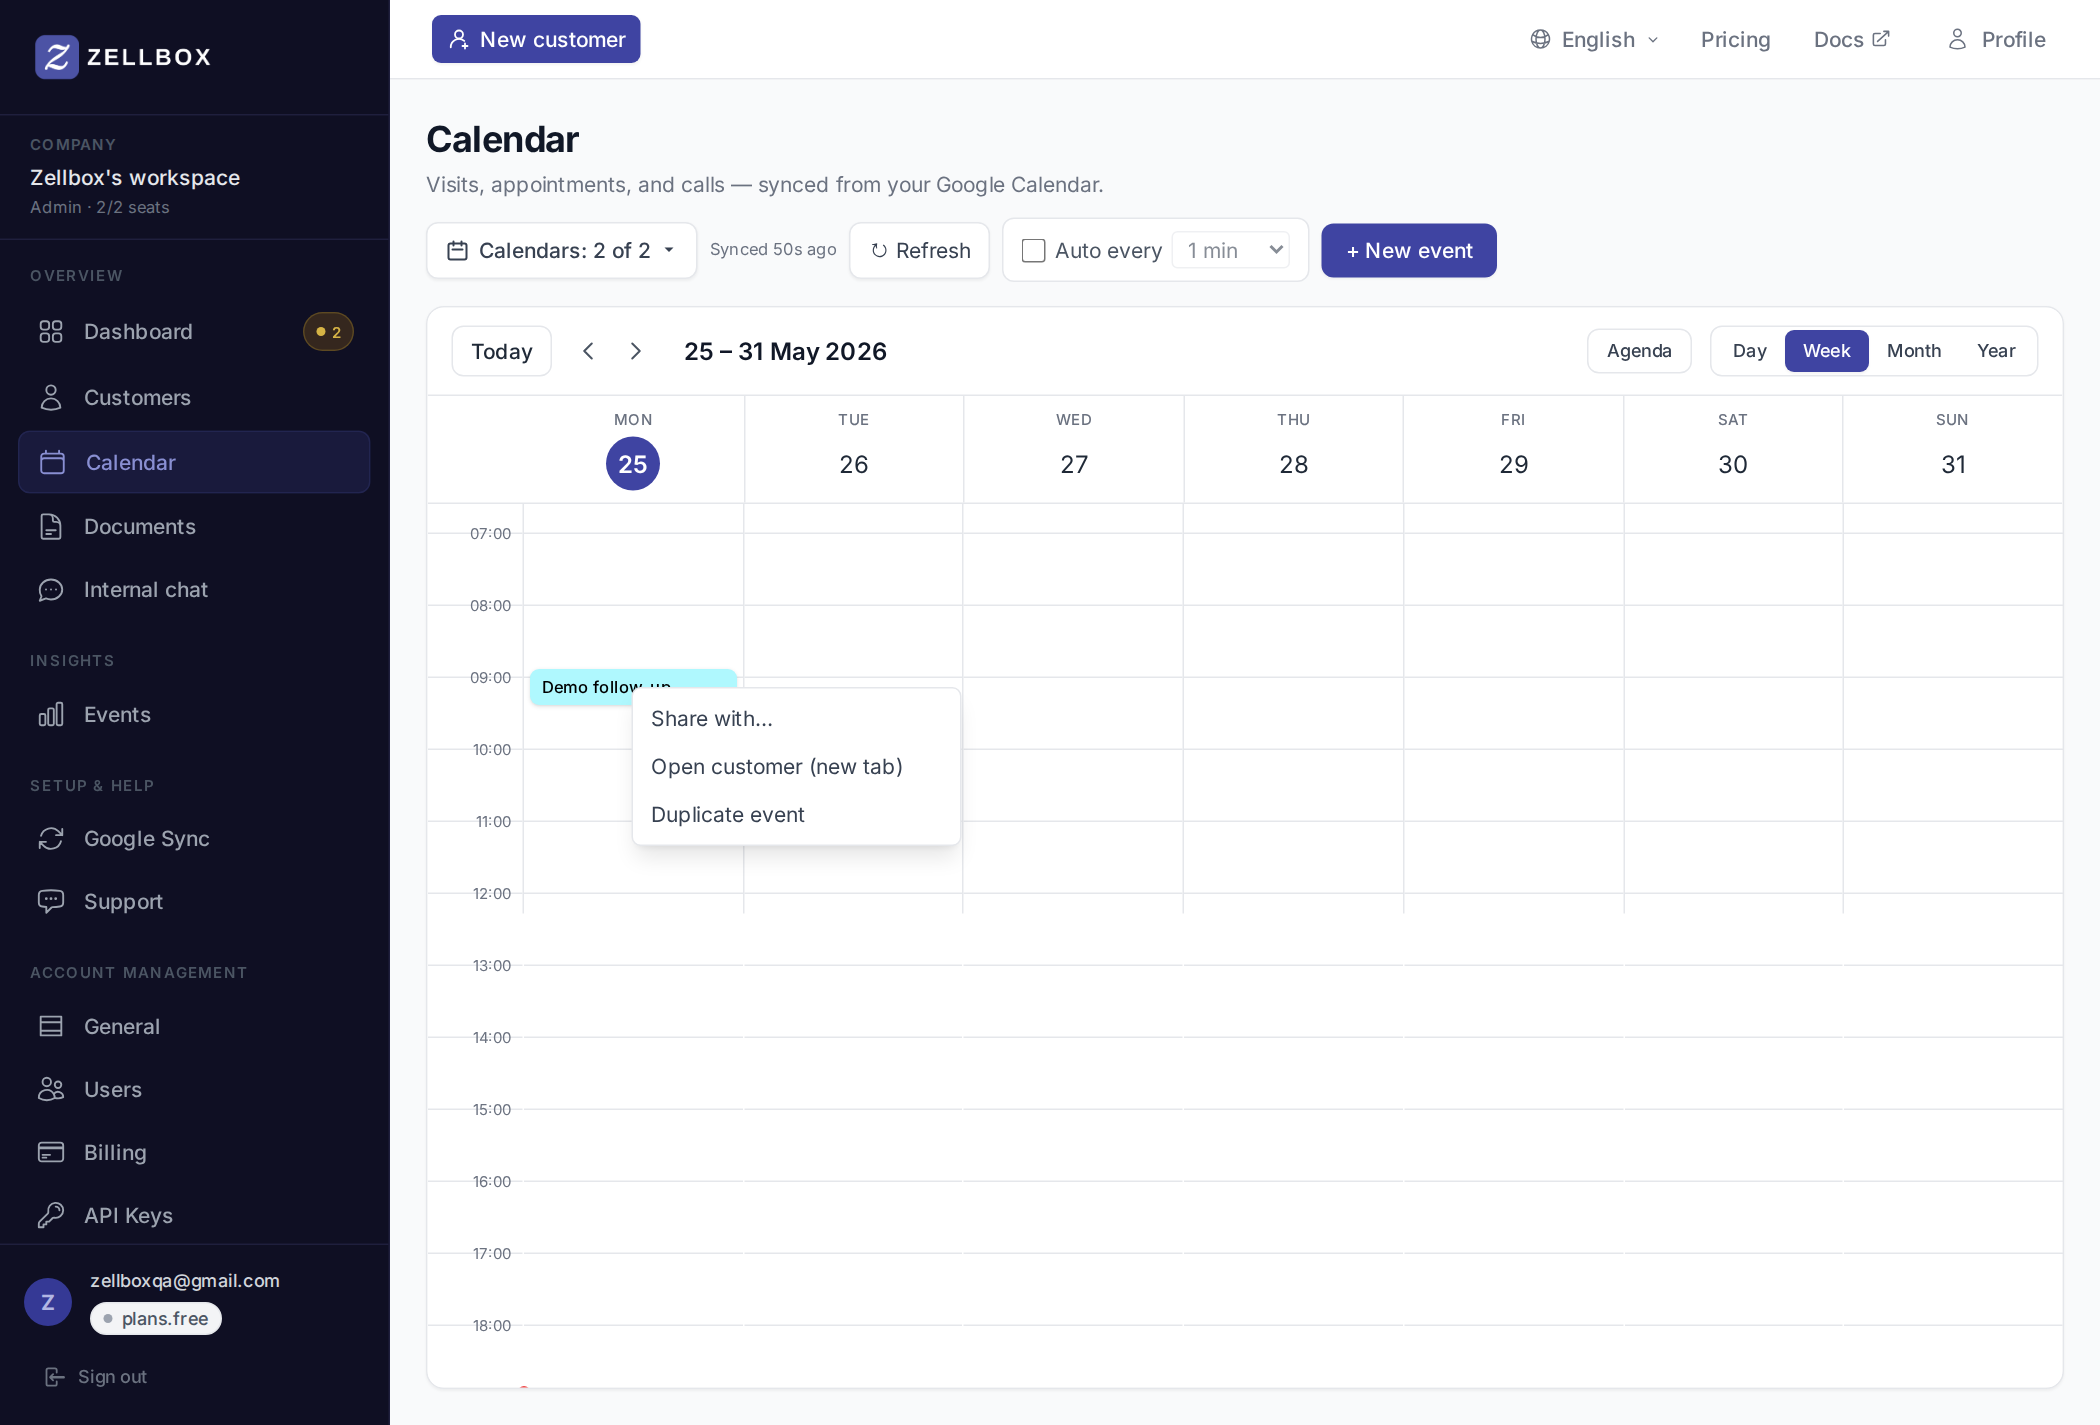
- The Share Event modal opens. Pick one or more workspace members to share with —
directif you pick one,groupif 2+. - Optionally add a note.
- Click Share.
Zellbox creates (or reuses) the chat channel, sends an event card into it, and drops you into the conversation. The recipients see the event card in chat — clicking it opens the event editor in-place over the chat page (no navigation away). See Chat for the full chat experience.
Cancelling vs deleting an event
The event editor (open via double-click) has two destructive actions:
Cancel event — keeps the row with
status: cancelledand a typed reason (from the workspace's cancellation-reasons list). Reports group by reason; the event is no longer "live" but the audit history stays.
Delete event — permanent delete. The event vanishes from your workspace and Zellbox pushes the cancel to Google so attendees get an automatic cancellation email (or not, depending on the Notify customer toggle).
Use Cancel when reporting matters (no-show, manager-unavailable); Delete when the event was a mistake.
Both actions are reversible for 90 days: Zellbox snapshots the event to the backup table before applying the cancel or delete. You can bring it back from Account → Recovery any time during the 90-day window. The Delete confirm dialog mentions this explicitly so you know the safety net is there before clicking. Restored events come back as Zellbox-only — they aren't re-pushed to Google automatically.
How sync works
- Background: every 5 minutes, Zellbox runs a sync for each connected user. Each calendar syncs on its own, so one slow calendar doesn't slow down the others.
- On-demand: clicking Refresh starts an immediate sync and the Synced N ago label updates as it progresses.
- Safety guard: if Google reports more than 25 event cancellations on one calendar in a single sync — or more than 20% of the events Zellbox has for that calendar — Zellbox refuses to apply them and surfaces a banner for operator review. See Sync status.