Appearance
Customers
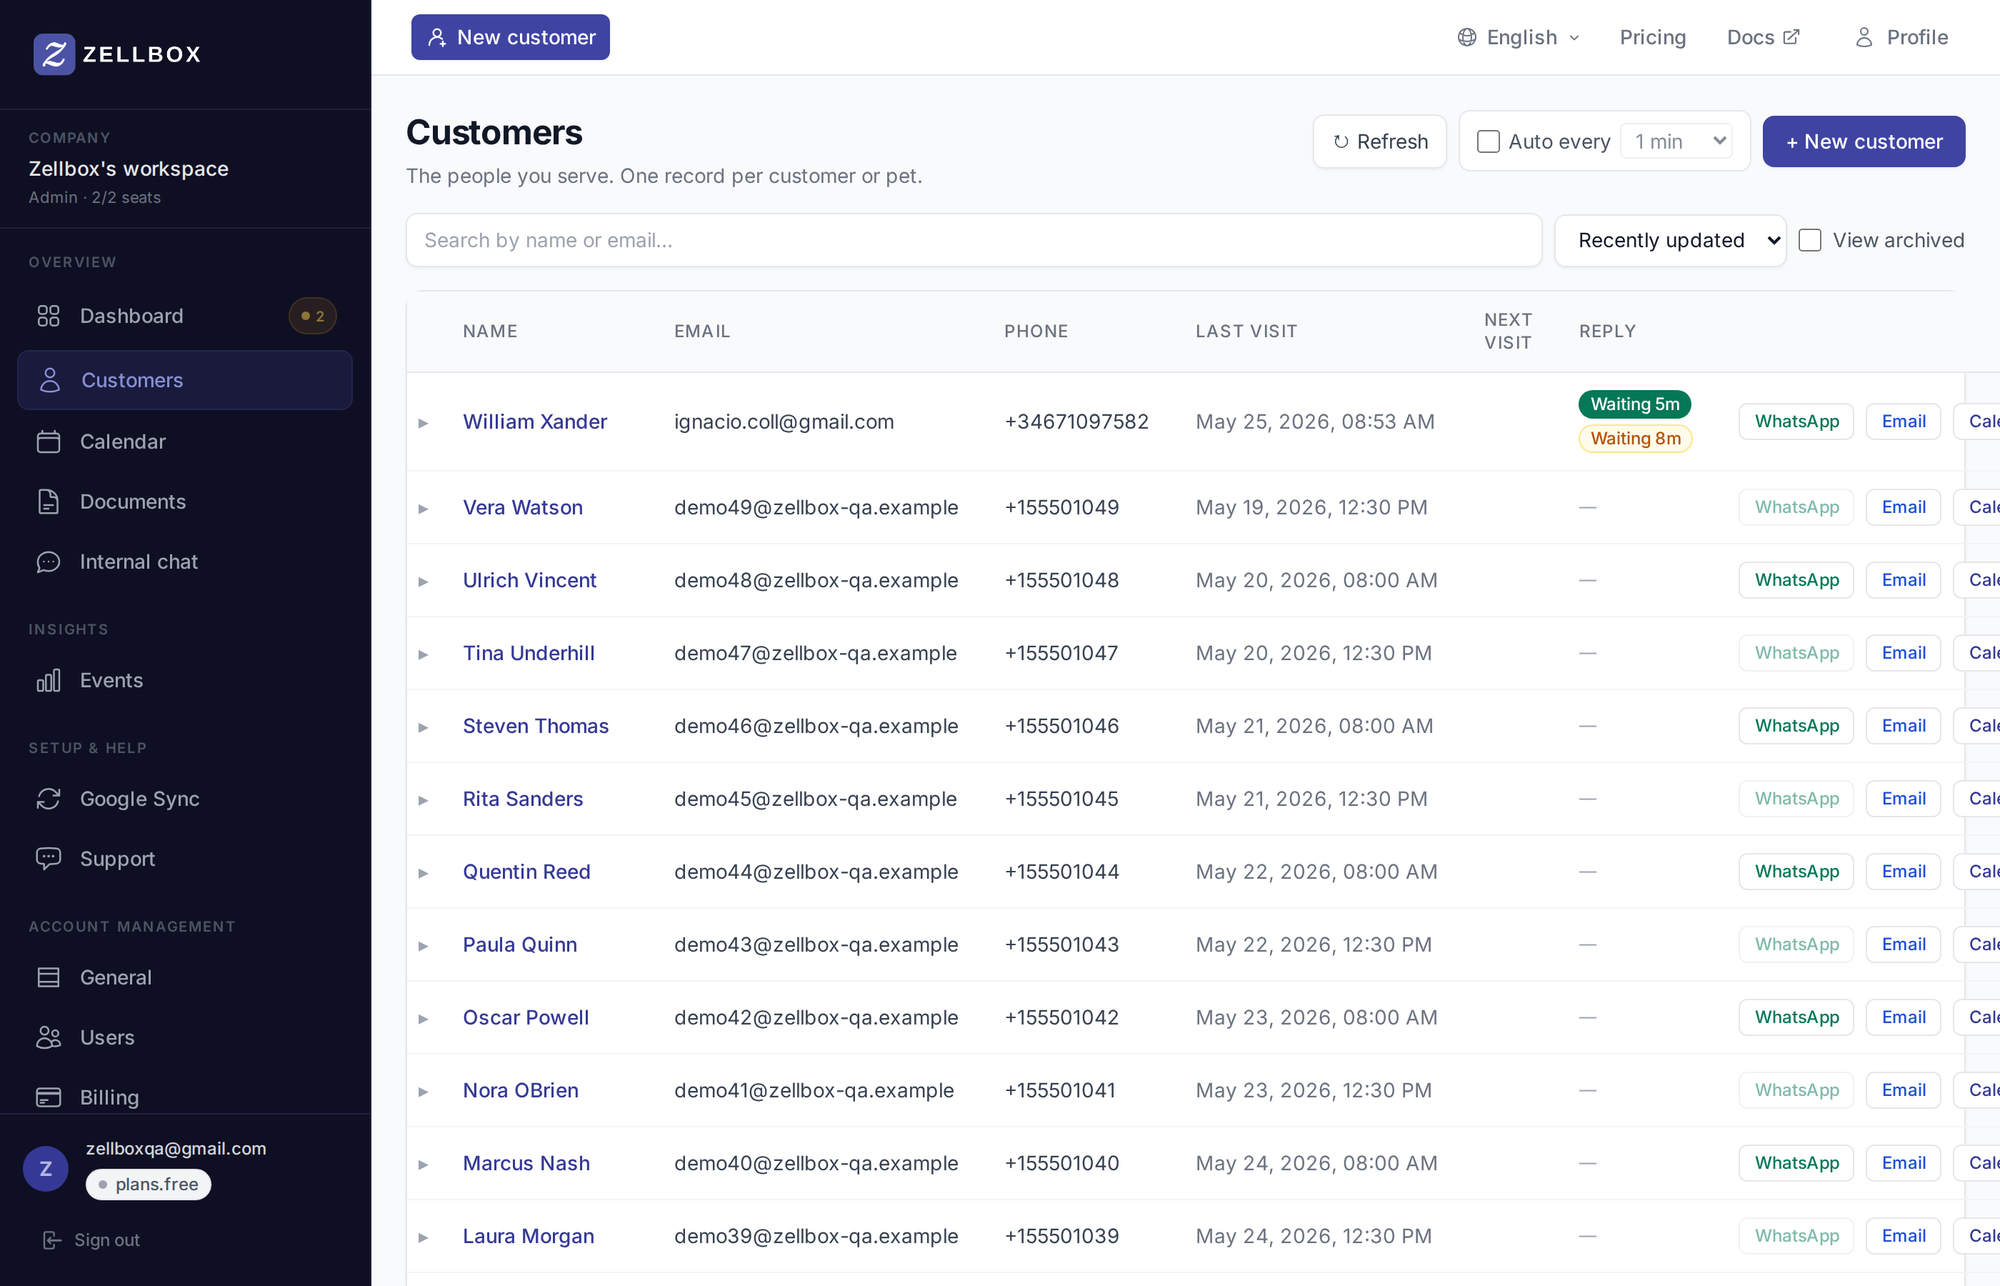
Customers is the most-used page in Zellbox. It's the searchable list of everyone in your workspace, with a click-through that expands a per-customer detail panel inline. Bulk import from Excel lives on Imports; WhatsApp and email threads open as full popups from the row's action buttons rather than as detail tabs, so the list stays visible behind the conversation.
Searching and viewing archived customers
The toolbar at the top of the list has these controls:
- Search box — live full-text search across first name, last name, email, phone, external ID.
- Sort dropdown — Recently updated (default) or by other fields.
- View archived — checkbox; when off (default) the list shows active customers, when on it shows only archived.
- Refresh — one-shot reload.
- Auto every Nmin — toggle + interval picker; refreshes the list on a cadence.
Results page when there are more rows than fit; click Next at the bottom to advance.
Creating a customer
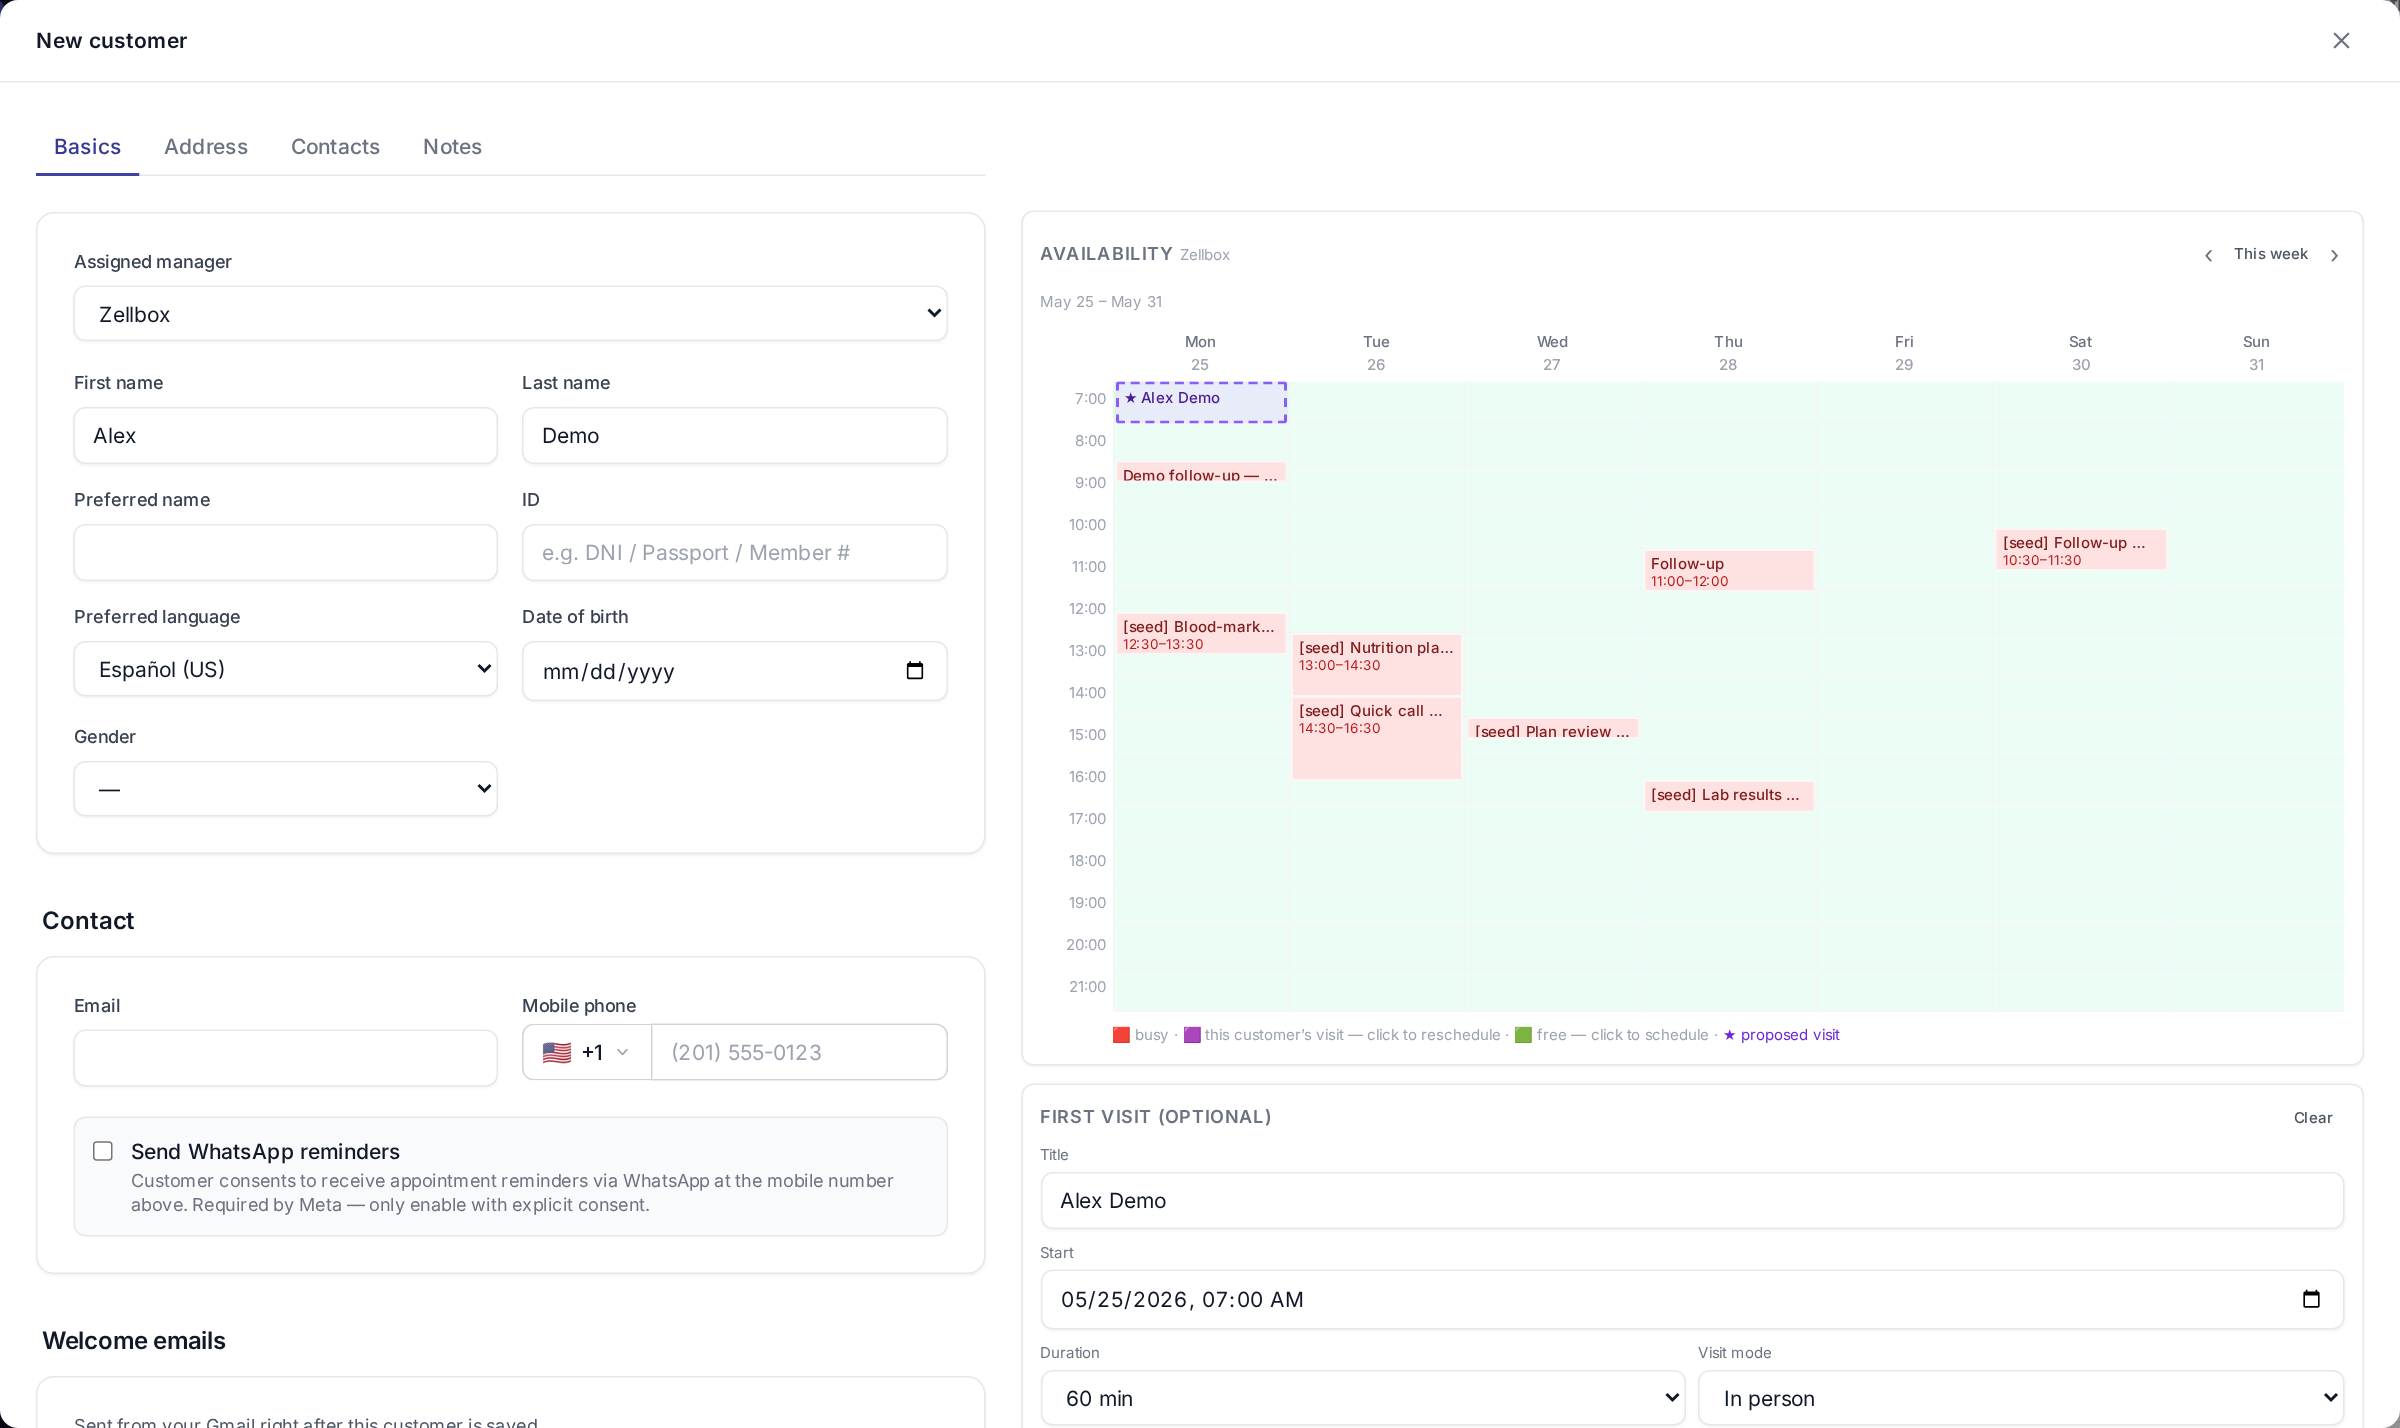
- Click + New customer at the top right of the list.
- The customer form opens with four tabs:
- Basics — name, email, phone, language, gender, birth date, assigned manager.
- Address — line 1, line 2, city, state, postal code, country.
- Tags & notes — comma-separated tags + a free-text note.
- Additional — any custom fields your workspace configured.
- Fill at least a first name or last name (one is required).
- Click Save.
If you have an email template flagged Send on customer create, that template auto-sends to the new customer's email on save.
Customer detail
When you click a row, it expands inline below to show the customer's detail panel, organised into tabs. WhatsApp and email threads are not in this panel — they open as full-screen popups from the row's WhatsApp and Email action buttons instead.
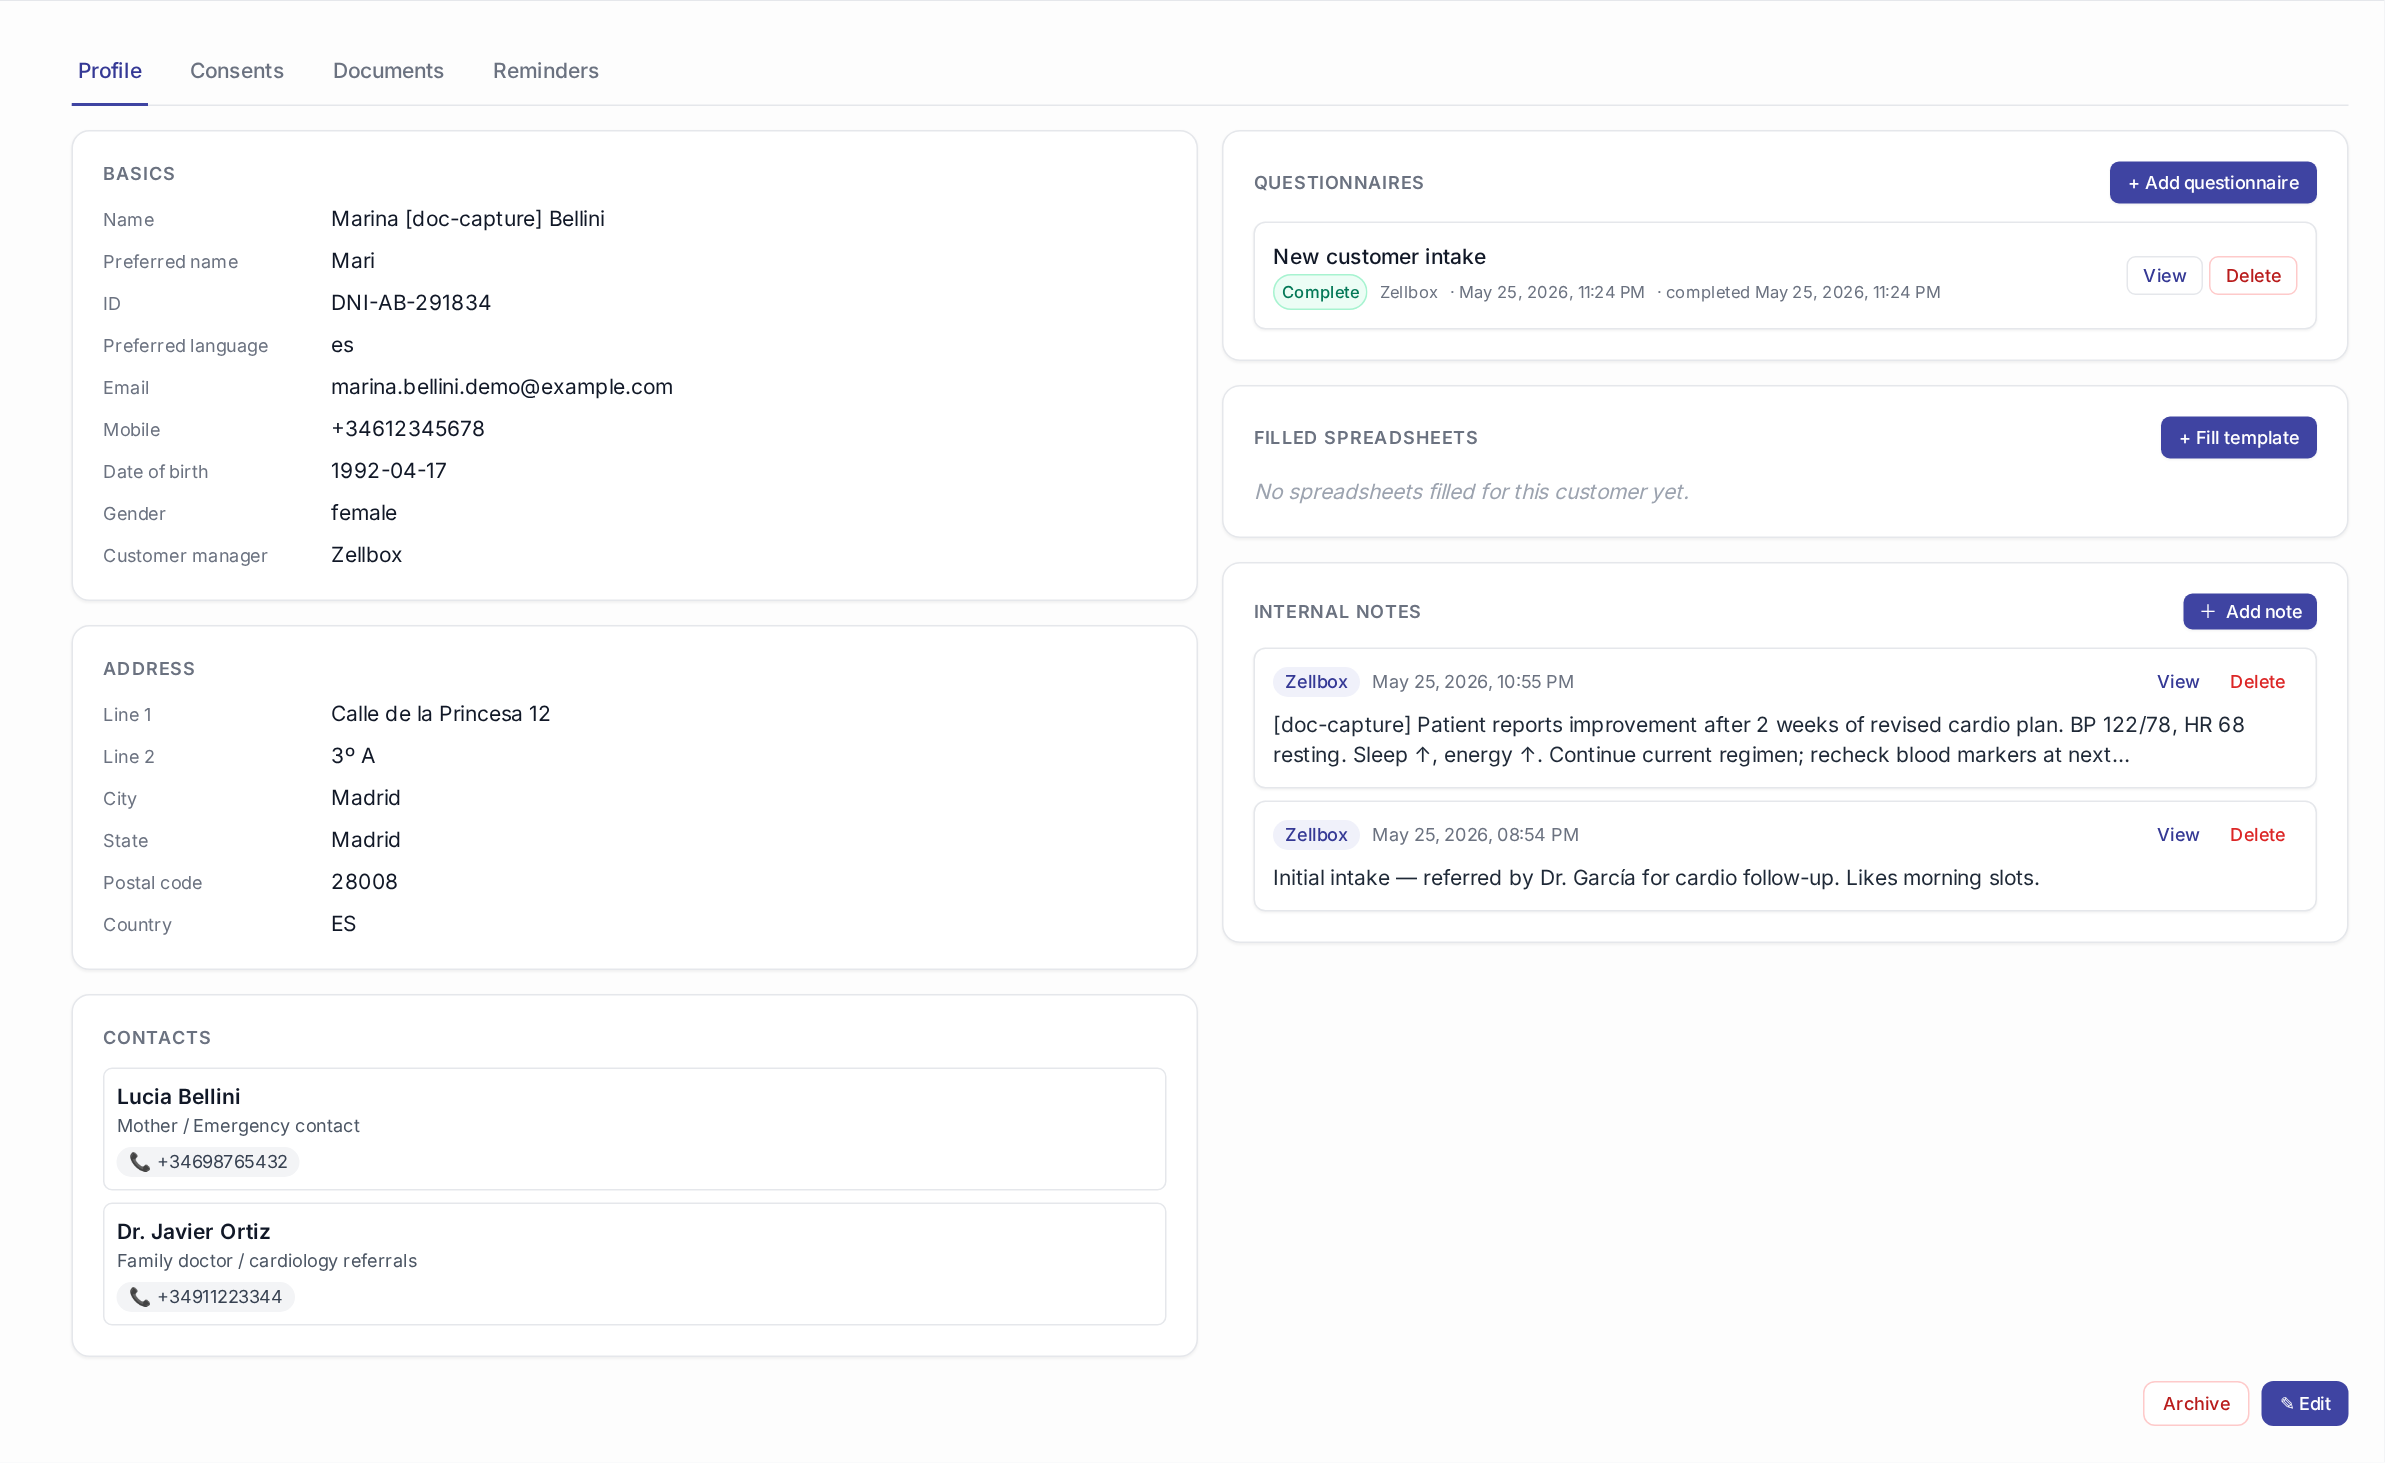
Profile
Identity + contact info, address, and your custom fields. The right column carries questionnaires, filled spreadsheets, internal notes, and an Archive customer button at the bottom. Click Edit to open the same form used on create.
Consents
Signed documents the customer has accepted — HIPAA, marketing opt-in, GDPR, whatever your workspace asks for. Each consent is anchored to a real signed file in Documents; typed- name acknowledgments are no longer the authoring path. The catalog of which consent types your workspace offers is admin-managed — see Account → General → Consent types.
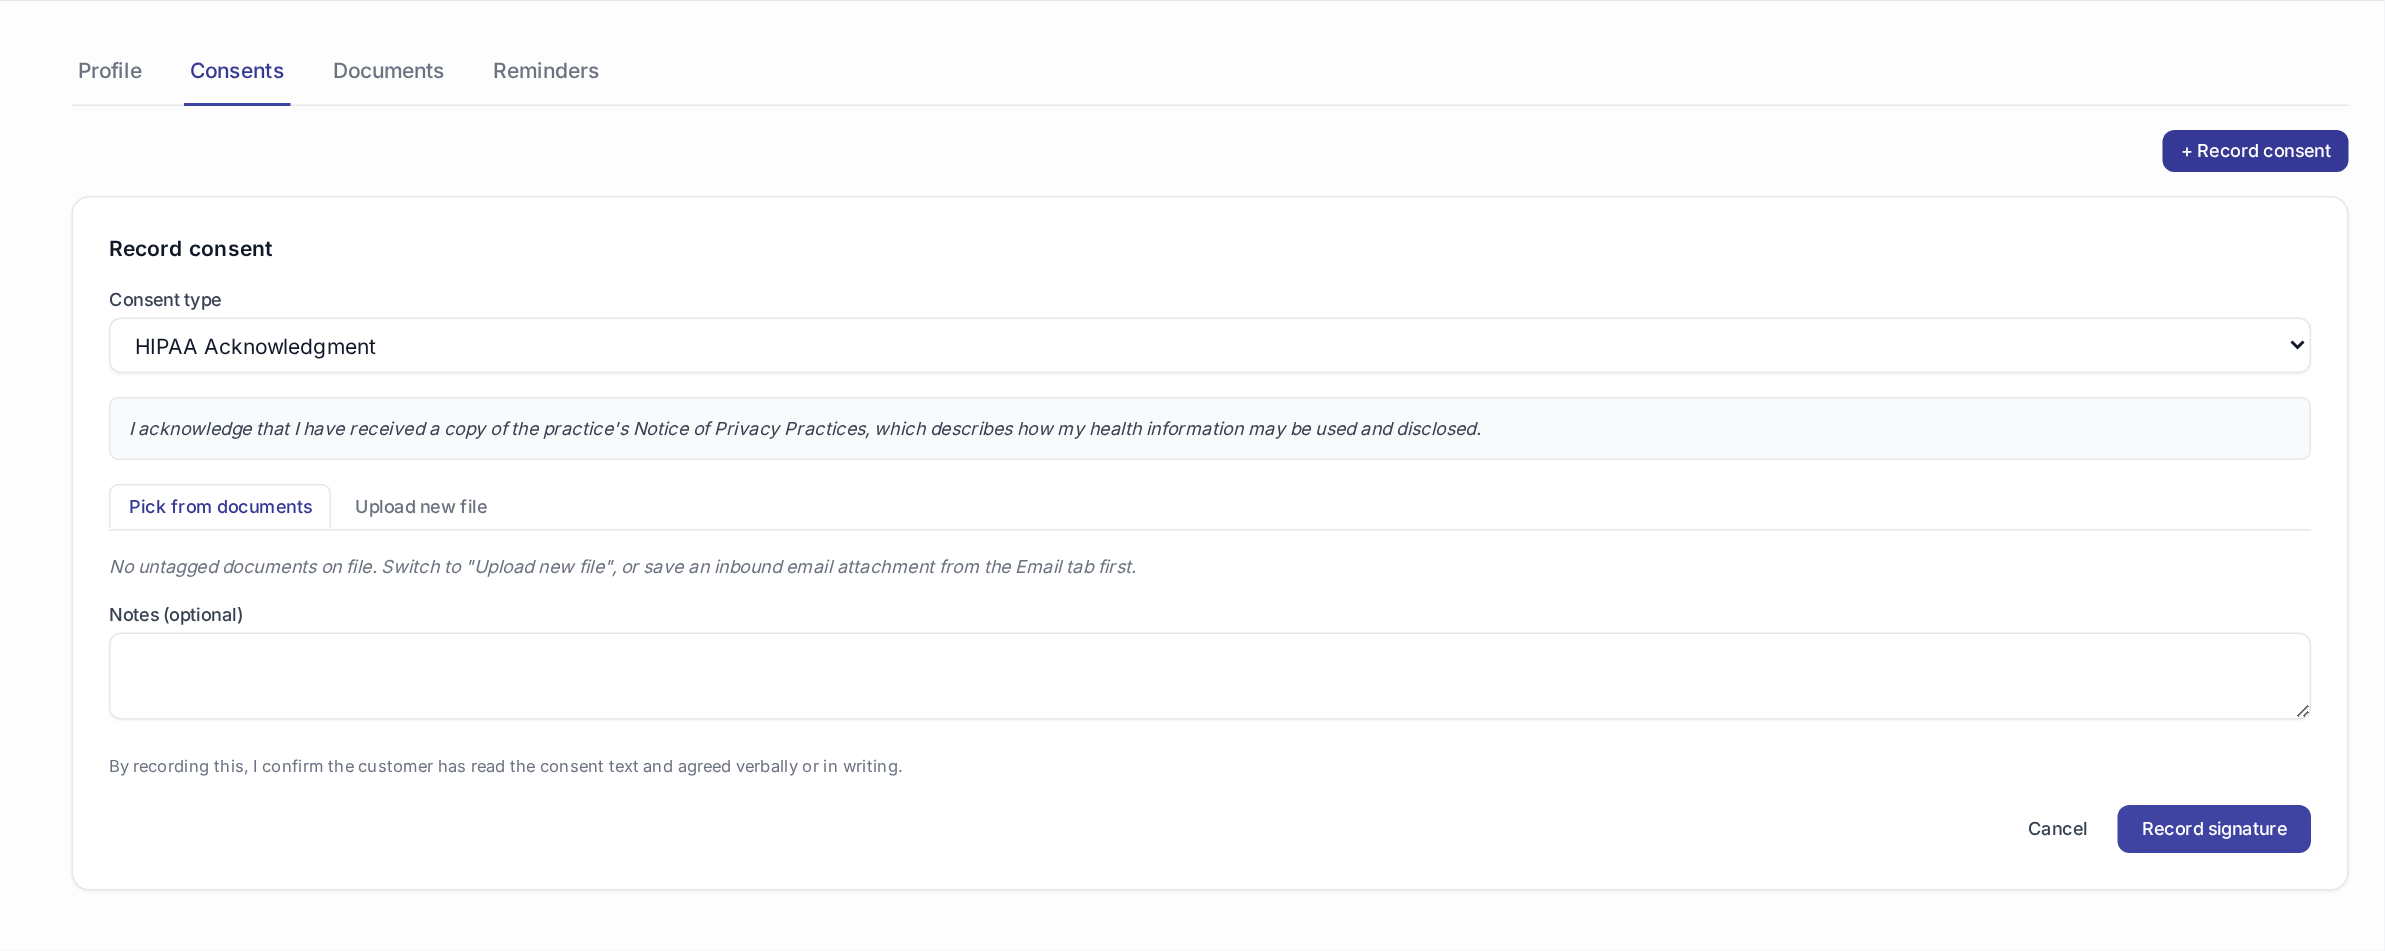
Recording a new consent uses a two-mode picker:
- Pick from documents — choose any untagged file already in this customer's Documents (the most common path: you've just saved the signed PDF from the inbound email's attachment chip in the Email panel).
- Upload new file — drop a freshly-signed file straight into Documents and tag it in one step.
Either way, choose the consent type from the dropdown above — the legal text shown is the body the customer agreed to (it snapshots onto the consent row at sign time, so editing the catalog later never changes what past customers signed).
If your admin hasn't configured any consent types yet, the + Record consent button is disabled. Add at least one type from Account → General first.
Withdrawing a consent flips its status to withdrawn and stamps the timestamp. The linked document stays untouched — withdrawal is an audit event, not a deletion.
Compliance roll-up. To see which customers are missing each consent type, open Insights → Compliance.
Documents
Per-customer document library. Upload Excel / PDF / image; later attach from the email or WhatsApp composers via the 3-source picker.

Reminders
Per-customer reminders — operator-scheduled nudges that fire on a configured offset. See Account → General for the workspace's default reminder offsets.

Archiving a customer
- Click the customer's row to expand it.
- Stay on the Profile tab.
- Scroll down — click Archive customer.
- Type the customer's display name in the confirm prompt to enable the destructive button, then confirm.
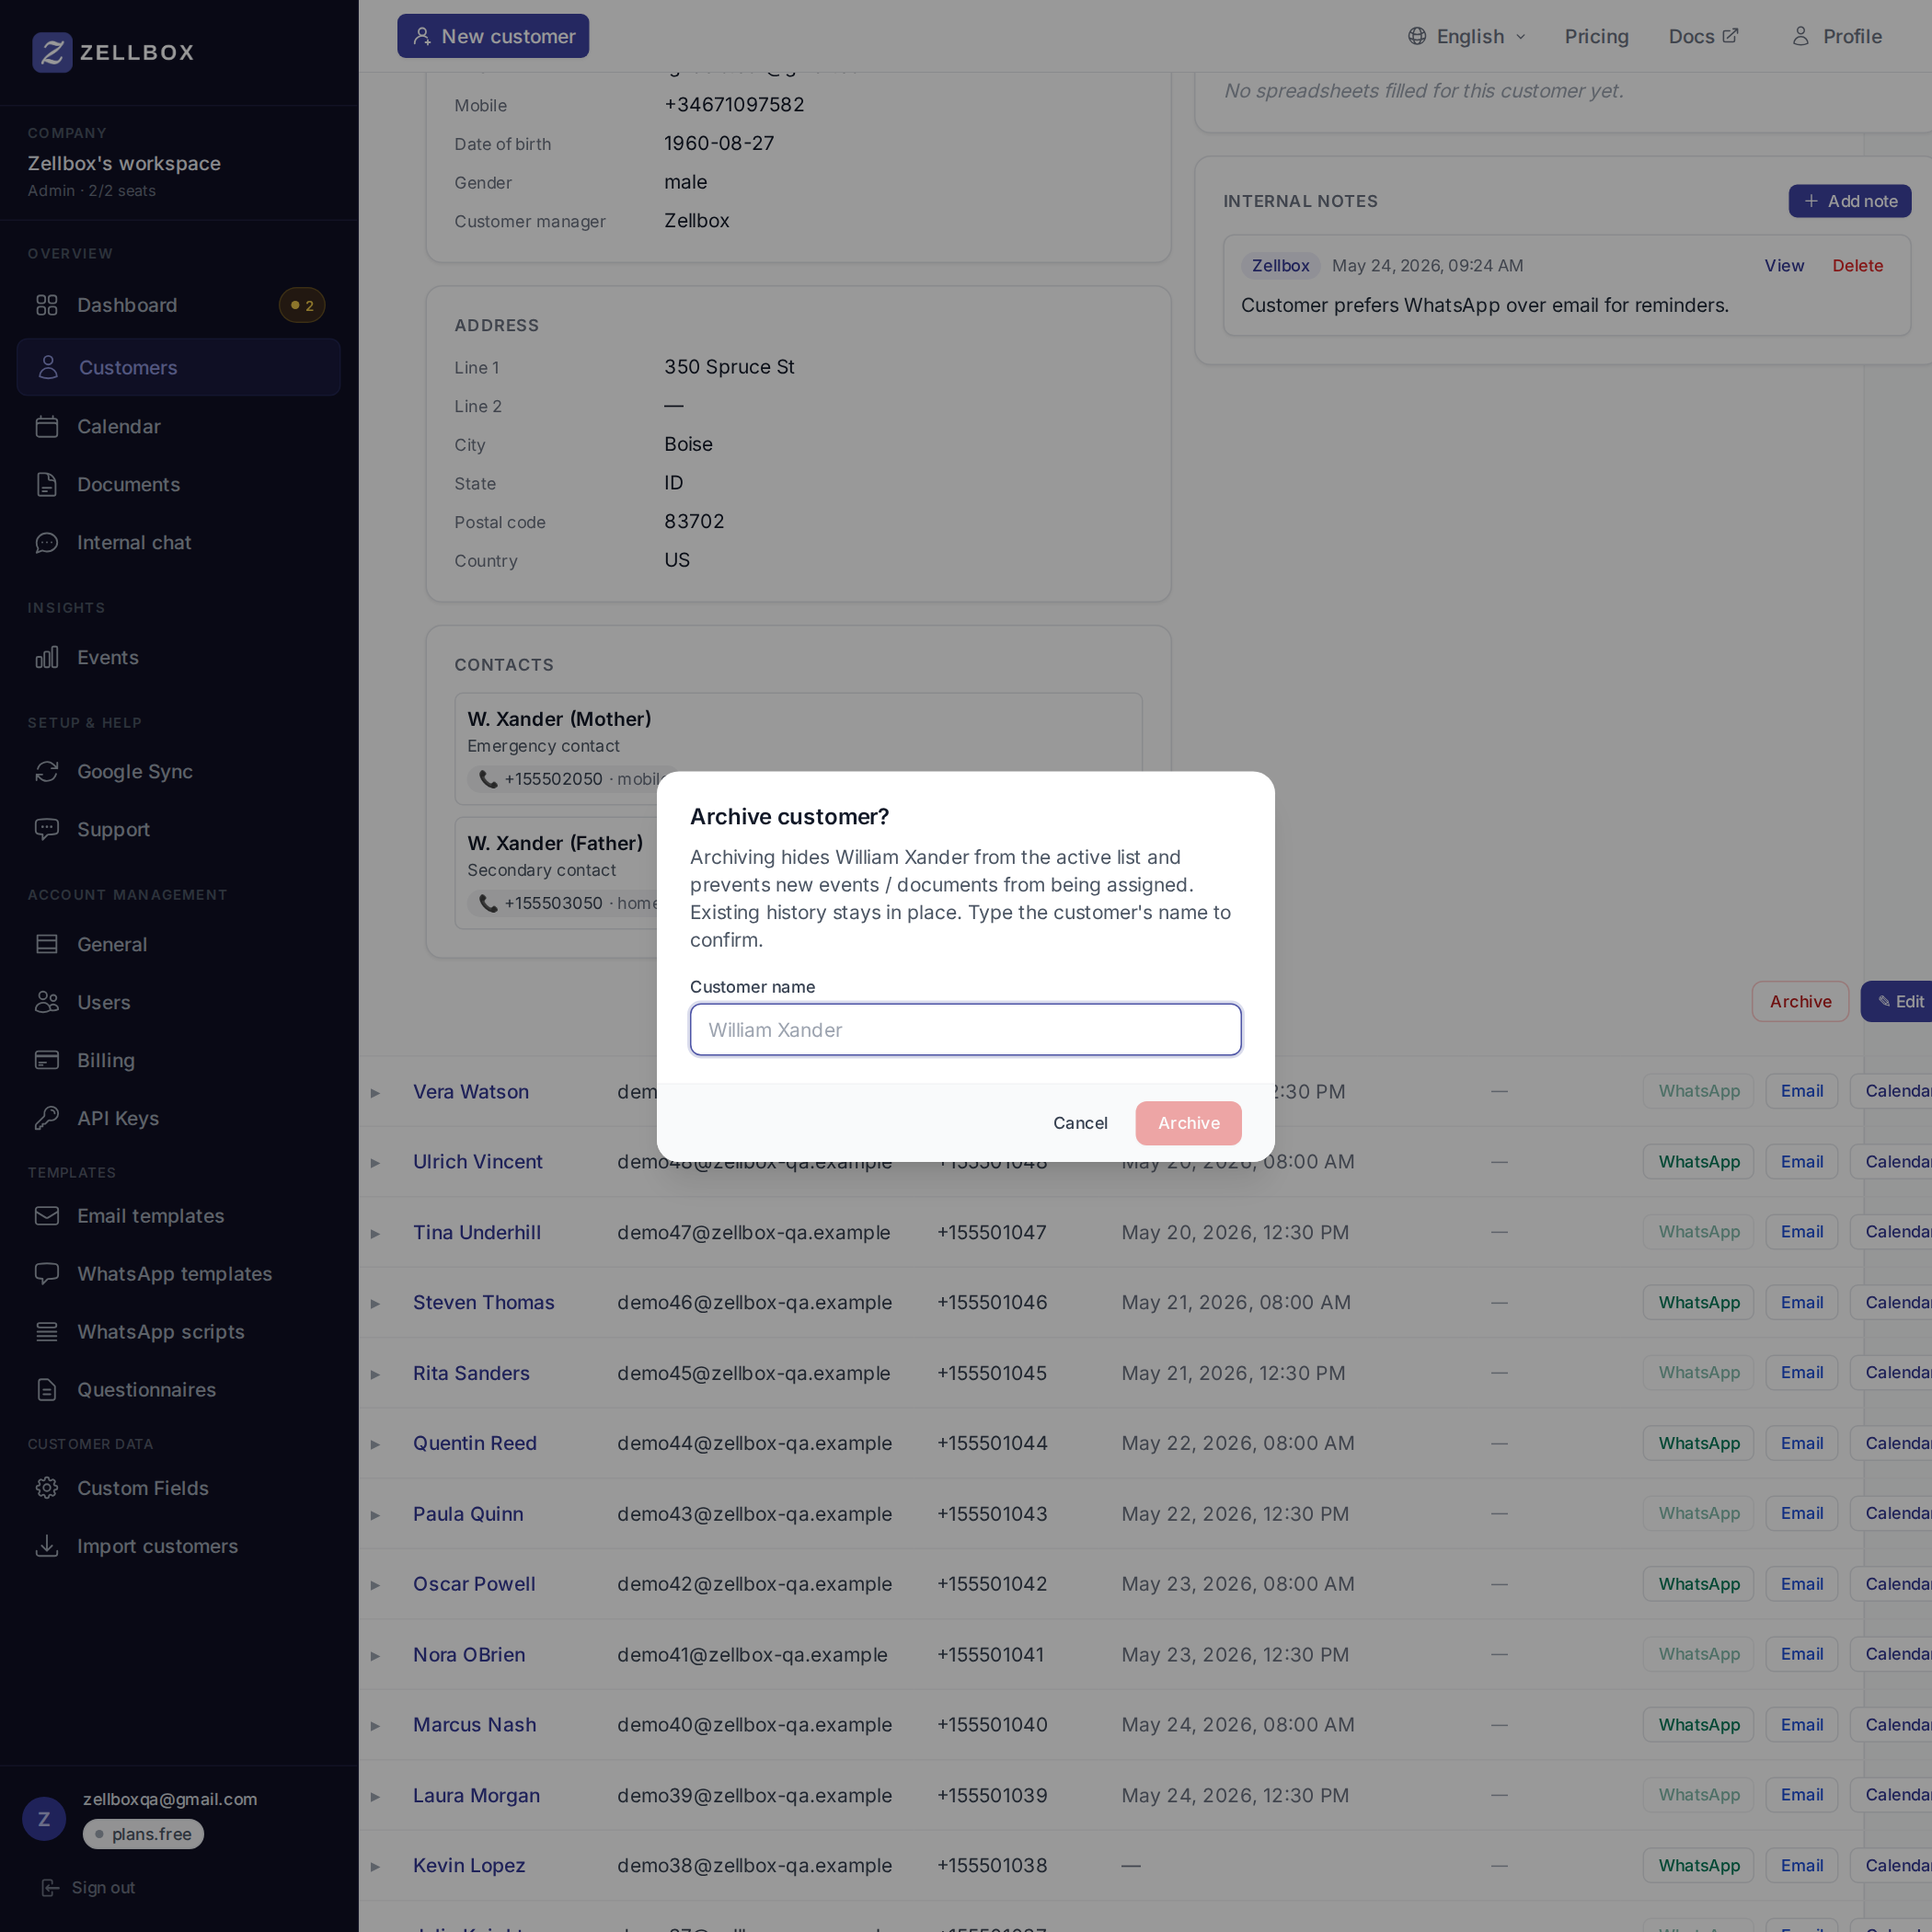
Archived customers don't appear in the default list, the dashboard, or in pickers (event form, email composer). Their events + history stay intact; toggle View archived to see them again.
Opening a WhatsApp or email thread
WhatsApp and email aren't tabs on the customer detail — they're on the row itself:

- Find the customer in the list.
- Click the WhatsApp button on their row → a popup opens with the full thread + composer + the customer's profile context on the right.
- Same for Email → opens the EmailsPanel popup with the thread + composer.
This keeps the customer list visible behind the popup so you can jump between conversations without losing context.
Scheduling an event for a customer
From the customer's row, click the Calendar action button. A full event-form popup opens with the customer pre-linked, the customer's primary manager pre-picked as owner, and a live week view of that manager's calendar alongside so you can see availability while picking a slot.
The event syncs to Google Calendar (your selected target calendar) within seconds. See Calendar for the multi-calendar selection model.